Gameplay: For The King II
Change to Second Game's Mechanics
The following gameplay mechanics are core features in For The King and comprise the basic set of rules for each of the game's different adventure modes.
Timeline
The timeline determines the order of actions and events, both in and out of combat.
Outside of combat, the timeline displays the progression of the day/night cycle. Also shown are any impending world events, such as roused scourges, growing chaos, flooding, and the planets aligning.

In combat, the timeline shows the relative turn order of character and monsters.

Chaos
A Chaos Meter with 3 emblem slots is displayed throughout the adventure, representing the level of Chaos in Fahrul. Chaos increases after a set number of turns unless otherwise mitigated.
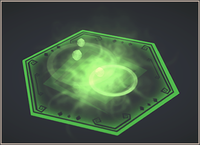
Each increase of Chaos represents the spawning of Chaos Hexes in the world, which impart a random effect upon crossing.
If the Chaos Meter reaches maximum capacity (i.e. 3 Chaos emblems are filled in), Cursed land will begin to flood the Land Hexes and the player will encounter Chaos Beasts.
Completing main story line quests, side quests in towns, or destroying Chaos Generators are methods of reducing Chaos.
When Chaos is reduced and you have no current Chaos level, it will be removed from the timeline instead, even if there is no chaos visible on the current timeline selection.
Chaos is not featured in the Frost Adventure gamemode.
Hexes
The land of Fahrul is divided into hexes. Hexes are used for movement as well as Locations within the game and are split into 5 main categories:
- Player Made Hexes
- Land Hexes
- Location Hexes
- Encounter Hexes
- Miscellaneous Hexes
Focus
Focus is used to boost your roll chances in combat and on various tasks, including Encounters and disabling Chaos Generators.
In combat, using focus points will provide a guaranteed success on your first roll (overriding the shocked status effect), and increase the base percentage chance of successes on your other rolls. The increase on base percentage has diminishing returns. Additionally, each spent focus during combat adds 5% to overall Critical Hit chance if a perfect roll is made.
Out of combat, focus can also be used to increase your available movement range by 1 per focus.
Max focus points can be increased through the Stone Circle encounter, the Sanctum of Focus, a Wishing Well, or through equipping specific pieces of gear.
Movement
Movement is rolled on the start of each turn.
Depending on the area you are in, a character will have a set amount of guaranteed movement, and will 'roll' for the rest of the movement based off of their Speed stat.
Flat bonuses to movement can be awarded from certain items or the Sanctum of Haste.
In the For The King and Dungeon Crawl gamemodes, any unspent movement will be converted into healing.
Focus Points can be expended (non-refund-ably) by right clicking on the map in order to gain bonus movement points within a turn.
Dancing Nettle can be used in a similar manner outside of combat.
Stats
Levels and Experience
Experience is gained in the form of XP, which can be obtained by:
- Killing Enemies
- Completing Quests
- Devoting to Shrines
- Paying tribute to statues
- Consumables such as Scholar's Wart
The max level cap is 14 and any experience gained after that is not counted.
| Level | Experience | Experience Needed For The Next Level |
|---|---|---|
| 0 | 0 | 25 |
| 1 | 25 | 45 |
| 2 | 70 | 60 |
| 3 | 130 | 90 |
| 4 | 220 | 130 |
| 5 | 350 | 160 |
| 6 | 510 | 210 |
| 7 | 720 | 380 |
| 8 | 1100 | 500 |
| 9 | 1600 | 600 |
| 10 | 2200 | 1000 |
| 11 | 3200 | 1400 |
| 12 | 4600 | 2200 |
| 13 | 6800 | 3200 |
| 14 | 10000 | 0 |
Combat
Damage types
Critical Hits
Every attack has a chance to proc a critical hit. For a critical hit to occur, the attack roll must be 'perfect' (all slot rolls succeeding).
Every character has a Base critical hit chance of 5%.
The chance of a critical hit then occurring is as follows:
1-100 roll < ((0.05 Base crit chance + Weapon crit chance + Crit modifiers) + (0.05 * Focus Points spent))*100
In practice, A trapper (Base crit chance 5%) using a bow with 10% crit chance and the Sanctum of Blood 10% crit chance boost spending 2 focus on an attack and achieving 'perfect' would have a 35% chance of performing a critical hit.
Critical hits can also be achieved through the Hunter's Called Shot ability.
Critical Damage
Critical damage varies based on the difficulty you are playing on. Higher difficulties have a lower critical damage output. Critical damage can be amplified through the Frozen debuff.
Weather

Weather is a mechanic that can affect the outcome of your rolls, the terrain, and chance of getting ambushed.
Clear Weather yields the chance to receive the Nice Day effect when completing your movement.
Rainy Weather reduces the amount of movement Tokens you roll at the start of your turn, clears poison off of Hexes, decreases your percentages of success on Awareness based rolls, and increases the chance of a successful ambush (on Creatures and the player)
Sandstorms decrease your percentages of success on Awareness based rolls, and increase the chance of a successful ambush (on Creatures and the player)
Any non clear weather creates the chance of a random negative Encounter related to the weather appearing.
In the Frost Adventure when outside of a Town, Dungeon or Tinder Pouch a character will take between 1 and 5 Cold Damage upon ending their turn depending on what area they are in.
Quests
Quests are short objectives that can be accepted from the Job Board in Towns. Only one quest can be taken per town. Quests last for 20 rounds after their activation, and will vanish after this time limit. There are four types of quest to choose from:
| Quest Type | Objective Description | Rewards |
|---|---|---|
| Bounty | Elimination of a specific creature somewhere in the region | Gold, Items, Party Exp |
| Delivery | Transport of an item from one location to another | Gold, Items |
| Retrieval | Locating one item and bringing it back to the Town | Items |
| Reduce Chaos | Defeating a Chaos Acolyte Camp | -1 Chaos |
Sanctums
Sanctums are a source of healing and permanent buffs to a character.
Each sanctum has a unique effect, and can be upgraded in the Lore Store after devoting to it 8 times.
Upon taking fatal damage, a character will be healed for a portion of their health, and be kept alive. In return, the sanctum they are devoted to is destroyed, along with the buff that the character had received.


